Horse riding is probably one of the healthiest hobbies out there. Not only do equestrian sports help in keeping you physically fit, but they also help you stay close to nature. Like every other physically taxing hobby, you need to acquaint yourself with the basics before getting started.
It’s important to realize that horse riding involves a key component that other sports don’t. This sport involves a living, breathing, and often wild animal. Properly tacking a horse is crucial before you begin riding. It becomes especially critical for beginners still learning to balance themselves on horseback.
Before getting started, we must first understand what the word tack means. Tack describes all horse-riding equipment, including saddle, stirrups, bridles, girths, boots, and other necessary items. This equipment varies with how you’re planning on riding your horse. Depending on your riding style and discipline, you may or may not need specific equipment.
Items Needed for Tacking Up a Horse
Before tacking your horse, we must first understand different tacking items. These can get a little overwhelming for first-timers, so we have tried to keep them as basic as possible. Both English and Western styles of riding require the tack items listed below.
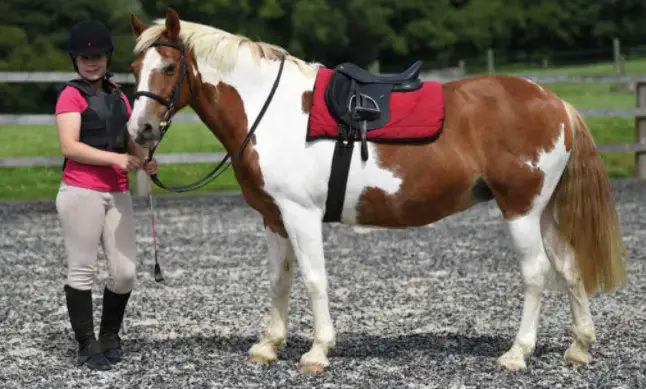
Saddle
The saddle is the most primary tacking equipment. It forms the seat for the rider on horseback. Saddles are made of genuine cowhide leather and are raised in the front and rear, providing the rider with an optimum fit. The saddle often sits above a cushioned saddle pad for the comfort of your horse. Depending on the riding style you adopt, these come in various shapes and sizes.
Bridle
A bridle is what allows you to control your horse. Riders attach it to the head of the horse while tacking up. It is employed to help steer and adjust the pace while riding. It consists of a headpiece, a browband, cheek pieces, a bit, and reins.
Stirrup
Stirrups are like footrests hung on either side of the saddle. These give the rider’s feet support while riding. A combination of leather and metal makes up the stirrup. The footrest is u-shaped and allows the rider to put weight on his feet while galloping.
Girth
A girth fits the horse’s underside and is positioned right behind its front legs. A long and thick cotton belt holds the saddle in place. Its absence would cause the saddle to become lopsided, making riding impossible.
Miscellaneous Items
Depending on the riding discipline you adopt, there will be several miscellaneous items you might need to use while tacking up your horse. This list includes breastplates and martingales, alongside overreach or exercise boots. As a beginner, however, you might not need any of these items.
How Long Does It Take To Tack up a Horse?
The time it takes to tack up a horse depends on various factors. As with most things, practice makes perfect. It also helps to have a broken-in horse who is well acquainted with you. Generally, basic tacking up should not take longer than ten to fifteen minutes.
Beginners, however, may not be able to achieve this time. Some horses require calming as they become irritable while getting tacked up. Tying them up or placing them in a saddle often helps speed up the process. Tacking up additional equipment like boots and breastplates would add another five to ten minutes to your time.
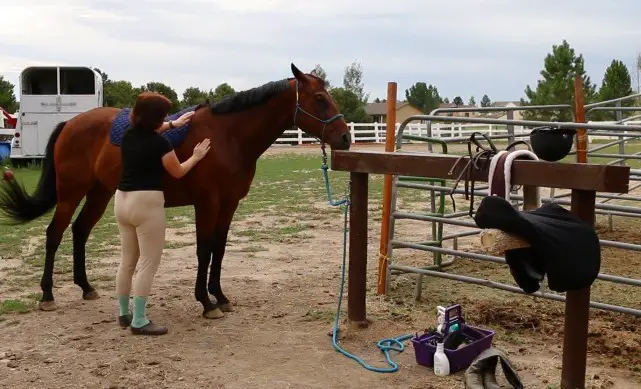
Horses are intelligent animals that develop a special bond with their owners. Much like dogs, it can take some time before they begin to trust you. Tacking up a horse is an intimate process that requires both individuals to trust each other completely. A novice should always tie their horse before tacking them up. Grooming and making sure to have your tacking gear organized are also important.
How Many Ways to Tack Up a Horse?
There are many ways to tack up a horse. Throughout history, tacking up has seen as much evolution as have riding styles. This article will focus on tacking up a horse for beginners and discuss the more popular riding disciplines in the modern age.

Tacking Up a Horse for Beginners
As a beginner, you need to keep the fundamentals of horse riding in mind to figure out the tacking up of your horse. It’s a relatively simple process and should not take more than ten to fifteen minutes. Basic tacking up can be done in a total of four steps.
Step 1: Putting on the Saddle Pad
The saddle pad is primarily for the ease of the horse. It would be best to place it on the horse’s back over the withers. It would be best if you were very careful while putting the saddle pad on, though. Make sure it’s in a position where the horse is most comfortable. It would help if you placed it slightly higher than the intended position so you could slide it down into the correct spot while putting on the saddle.
Step 2: Placing the Saddle
The saddle should sit in the center of the saddle pad. Try placing it so that the saddle and saddle pad sits right behind the horse’s shoulders. The saddle pad needs to be present on the entire base of the saddle. Otherwise, the horse will get irritable.
Step 3: Connect the Girth
The girth goes under the belly of the horse. Connect the girth to the saddle’s right side and move it to the left. It should be behind the front legs. Make sure you don’t kneel while connecting the girth. Kneeling might result in you becoming more vulnerable to the horse’s kicks.
Step 4: Putting On the Bridle
To put on the bridle, you must always start with the bit. The bit should be gently cupped and slid into the horse’s mouth. Once the bit is in, slide the top of the bridle over the horse’s ears and head and fasten the throat and noseband.
Tacking up a Horse in English Style
Tacking up a horse in the English style is a nine-step process.
- Tie up or place the horse in an enclosed stable or paddock. The restrictions will limit movement making the process easier.
- Gather all your tacking gear in one place and ensure you have everything you need.
- Stand on your horse’s left side and place the saddle pad on its back. Keep the saddle pad a little higher than the withers at first. You will be sliding it down while putting the saddle.
- Place the saddle on the horse’s back, again from the left side. Slide it down a little along with the saddle pad to make sure it fits comfortably on your horse’s back.
- Attach the girth to the saddle’s right side and move it to the left. Once you’ve fastened the girth on both sides, make sure it is tight enough. The general rule is that while the girth should be close enough to make sure the saddle doesn’t move around, you should still be able to insert two fingers between the girth and the horse’s belly.
- Adjust the stirrups. For most riding styles, the stirrups should equal the length of your fingers from your armpits.
- Place the reins over the horse’s neck while ensuring they don’t tangle. Also, make sure that the buckle at the end of the reins is facing outwards.
- Place the bit in the horse’s mouth as described earlier. Some horses may need a little bit of motivation. Try putting your finger in the horse’s mouth to encourage it to open.
- Place the bridle as explained before, making sure there’s a four-finger gap between the throat and throat latch.
Tacking Up a Horse in The Western Style
Tacking up a horse in the western style is a seven-step process.

- Place the saddle pad on the horse’s back, the same way as in the English style. In the Western discipline, the saddle pad may be an actual saddle pad or a woven blanket.
- Moving to the left side, gently place the saddle on the horse’s back. Make sure it’s in the center of the saddle pad.
- Lower the cinch; this is the same as the girth in the English discipline. From under your horse, grab the cinch, run the latigo through it, and go up again to the saddle. The latigo is made of leather and connects the cinch to the saddle or rigging.
- As before, tighten the cinch so that the saddle doesn’t move around, but you’re able to insert two fingers between the conch and the horse’s belly.
- You may tie the excess latigo through the rigging like a bow.
- The bridle is slightly different from the one in the English discipline. After placing the reins, buckle the halter on your horse’s neck. Slide the headstall upwards over the horse’s head and neck using one hand.
- Adjust the cheek straps on the headstall as the final step.
Final Words
Horses are one of the noblest creatures to roam this earth. Amazingly enough, they have chosen humans as companions for centuries. Moreover, they bond with their riders and caretakers in much the same way as dogs bond to their owners. However, you must remember that horses have a temperament and might throw tantrums when they’re not in the mood.
Horse riding is one of the best hobbies out there, but you need to be careful not to injure yourself. Follow the rules and guidelines of your instructors and get to know the animal you’re going to bond with. Here’s hoping you have a great experience.
